
The Importance of Proper Installation: A Lesson from Bruntons Sigmadrive
- Apr 26, 2025
- 4 min read
Updated: May 6, 2025
This blog post highlights our most recent experience with the Bruntons Sigmadrive, the final piece of our engine installation. We had not made any adjustments or repairs since handing it over 12 months ago. Recently, we subjected these drives to a rigorous test. This involved a new Dynamic Positioning system from Praxis Automation, which required multiple reverse thrust commands under both electrical and diesel power.
A little time and experience have taught us to be cautious with anything carrying a Naval Yachts installation stamp. Their consistent neglect of proper installation instructions has led to our cautious outlook for a smoother experience. Unfortunately, this time, the last part of the driveline had not received our thorough examination, and it ultimately failed.
Insights on the Bruntons Sigmadrive

The SD225 drive we fitted had slight modifications. Nonetheless, it showcases the principal components well.


We noticed spalling on the locating wedge and corresponding marks on the prop shaft. These were polished before we refitted them. The center picture illustrates the inset that should accept the smaller diameter of the tolerance ring. This ring ensures proper axial alignment. On the right, the images show the inner coupling and our necessary cut to remove it.
Testing our Praxis DP System revealed a flaw in our setup. Fortunately, this occurred in the controlled environment of the New River in Fort Lauderdale, allowing us to make a safe return home. Upon inspection, we found rolled swarf particles in the bilge space underneath the port drive. Consequently, we ordered two new drives and set out to address the issue. Fortunately, Bruntons responded quickly, and we are grateful for their help.
Uncovering Poor Workmanship from Naval Yachts
Upon removing and inspecting the coupling, we found multiple causes for the failure. All were related to poor workmanship:
The flange retaining studs were loose because Loctite was not applied to secure them into the coupling body. Additionally, two studs were installed backward, making them inaccessible for proper tightening.
The output flange register had been installed backward. This misalignment could result in improper axial alignment between the gearbox flange and the coupling flange. As a result, the smaller hex bolts faced misalignment loads.
The ring of smaller hex bolts was loose, lacking Loctite on the threads. They had presumably loosened due to alternating loads. Brunton's installation instructions specified using Loctite 290 (permanent fixing) in these locations.
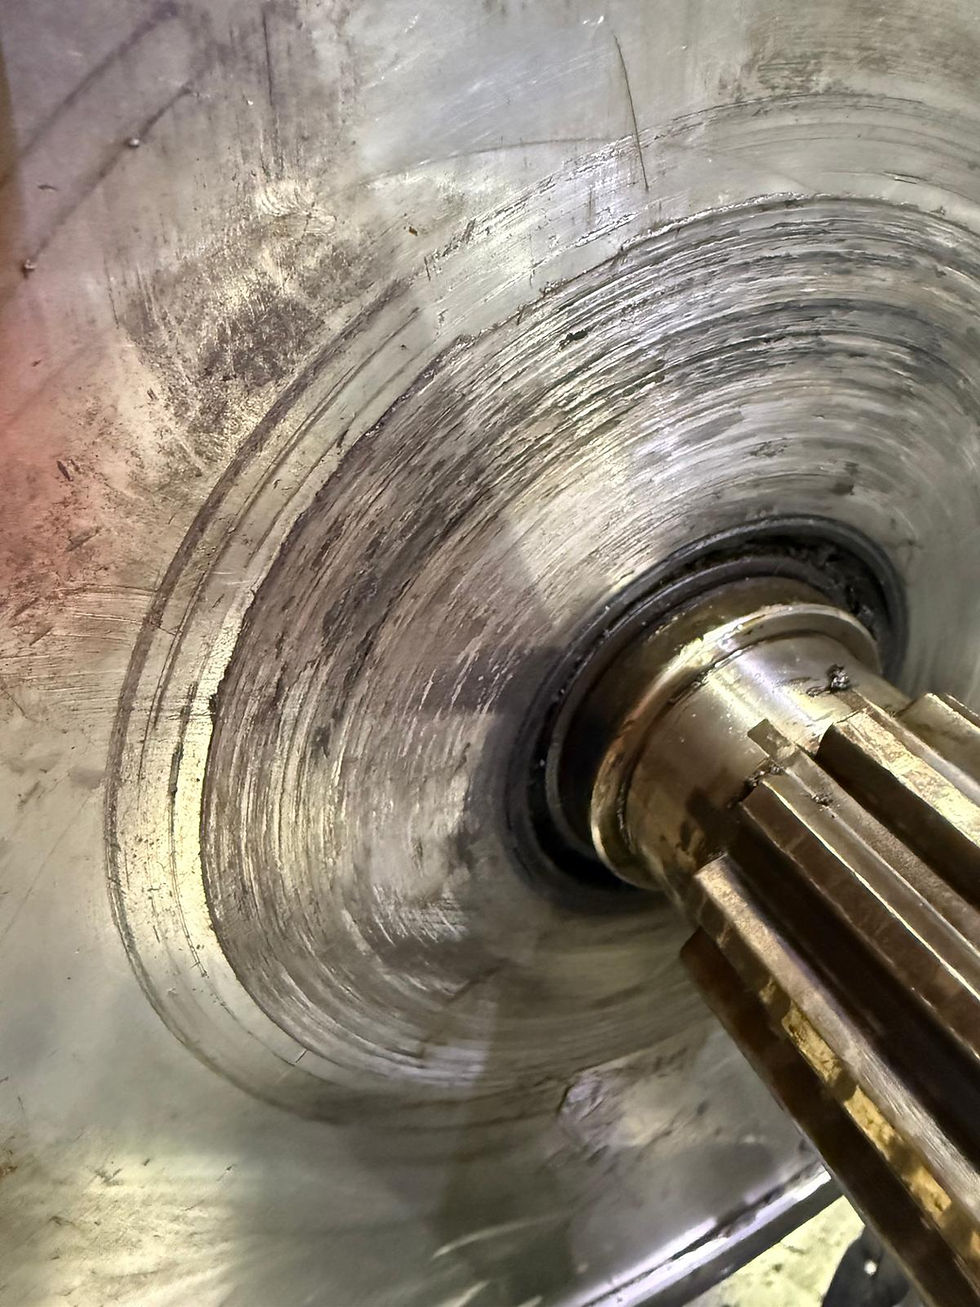
The shaft-securing wedge had spalling damage from being allowed to spin initially. It was overtightened and seized, causing a need for the coupling to be cut away for removal.


The output flange register ring was oriented incorrectly. You can see fretting marks on the face and damage around the thread holes. We could not remove the coupling boss using jacking screws due to over-tightening; we ultimately had to cut it off the shaft.
When driving ahead, the movement was constrained in compression. This wasn't immediately visible, but it was occurring. However, parts separated during reverse operation, causing eccentricity and vibration. This generated small metal particles that fell into the bilge space.

In summary, we encountered a "bugger's mess," largely attributable to Naval Yachts. It's disappointing that this issue overshadows their good work. Recognizing faults is crucial for making things right. Sadly, Naval Yachts has not accepted responsibility for these issues, despite their marketing claims. Nevertheless, with effort and the application of Rule 1, all things are fixable.
A Fix in Fort Lauderdale

Aligning a Constant Velocity coupling in-situ is challenging as it introduces flexibility. Bruntons provides small plastic wedges to lock the drive parallel to the shaft line. We use these to check radial alignment by locking the flexible drive into one unit. Surprisingly, alignment was quite good, only 0.3mm off vertically and horizontally, and spot on axially.
Joe, the mechanic from Yacht Management, has extensive experience with this job and was pleased with the outcome, considering that the engine is mounted on flexible supports. It can be gratifying to be proven wrong at times! Plus, we're relieved that we no longer need to readjust the six engine mounts and two hybrid drive couplings that we had previously reset.
The failure stemmed from a failure to follow installation manuals and proper supervision as outlined in Rule 1. We replaced all damaged drive components, cleaned the shaft of any spalling marks, and followed instructions meticulously during reassembly, including torque settings and Loctite application.
We were then ready for another test. With shorelines doubled up, we ran alongside at 50% load on one driveline in reverse for two hours. It stirred up quite a scene in the New River. Overall, everything went smoothly—other than the impact on our bank account.
Chris Leigh-Jones
Further Reading:
Bruntons Sigmadrive SD255 Brochure: Bruntons Sigmadrive Brochure
AB Marine: AB Marine
King Propulsion: King Propulsion
BoatTechTV Episode 7 - SigmaDrive Shaft Coupling (YouTube): BoatTechTV
Prism Reviews: Bruntons Sigma Drive (YouTube): Prism Reviews
NauticExpo: NauticExpo
Stone Marine Group: Stone Marine Group


It takes a special amount of carelessness to not bother to read manuals or even check diagrams for install of such a fundamental system on a cat A boat --- the driveline !
Hi, In a recent blog you reported noise levels being lower than expected. Does the type of engine mounting contribute to that?